Setting tones and layers
Enables you to set the musical instrument tone to match the ambiance of a song.
-
1.Tap the “Tone” button.
-
-
2.Specify the settings below.
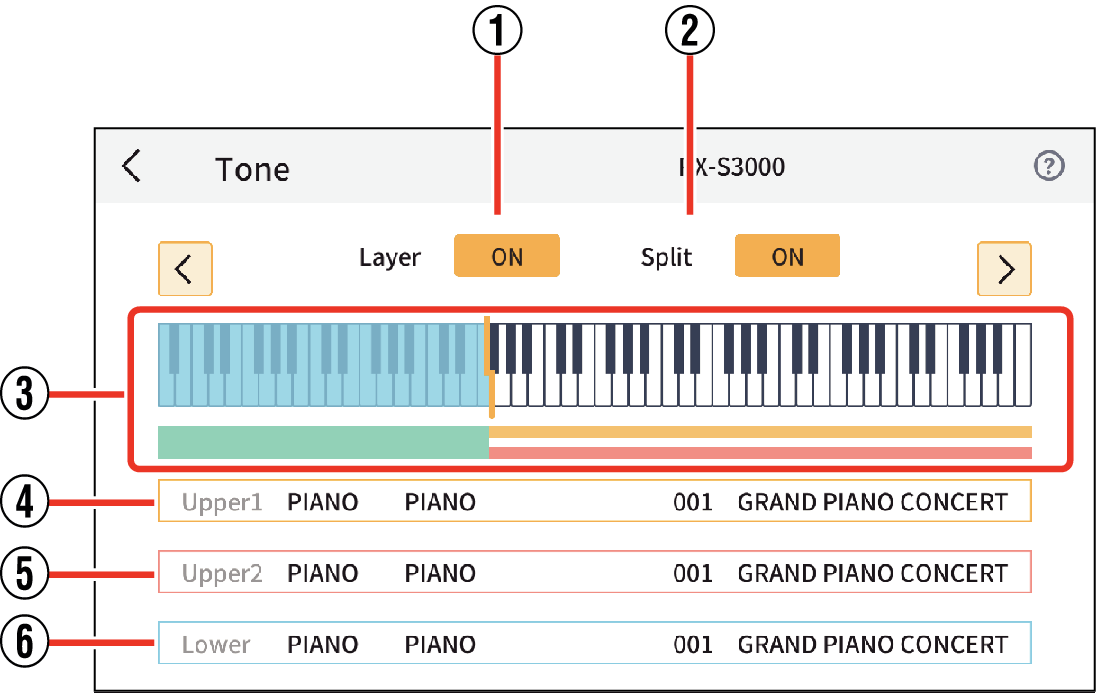
- ①
-
Layer ON/OFF button
Enables/Disables the function for playing with two different tones overlaid. Selecting ON enables layer tones (“Upper2”) and the instrument produces both “Upper1” and “Upper2”.
- ②
-
Split ON/OFF button
Enables/Disables the function for playing with different tones in high and low ranges. Selecting ON enables split tones (“Lower”) and the instrument produces “Upper1” and “Lower” or “Upper1”, “Upper2” and “Lower”.
- ③
-
Configuring split points and displaying parts separately
They are displayed in different colors according to the settings in Layer and Split.
Tap the keyboard or the color-coded display area to display a list of tone names.
Turn on Split to show the dividing line between the treble and bass ranges (split point). You can also set and change the split point by sliding it left or right on the keyboard.
- ④
-
Upper1 tone button
The main tone is displayed. Tap to display the tone list screen and change the tone settings.
- ⑤
-
Upper2 tone button
Displayed when Layer is ON. The secondary layer tone is displayed. Tap to display the tone list screen and change the tone settings.
- ⑥
-
Lower tone button
Displays the bass range when Split is ON. Tap to display the tone list screen and change the tone settings.
Part settings
-
1.Displays a screen showing a list of tones for the part to be reconfigured.
-
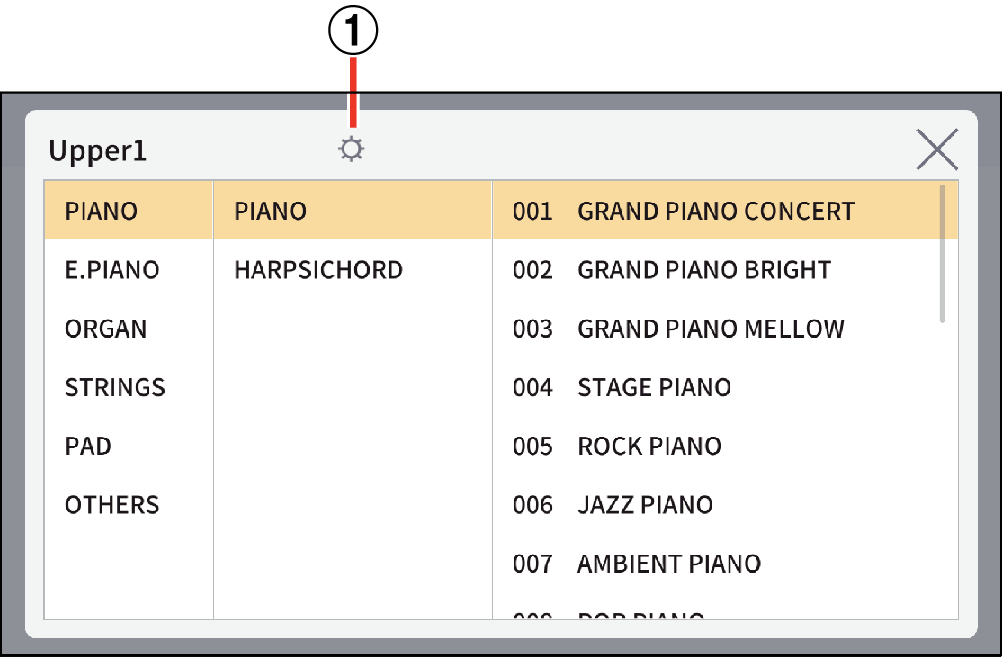
- ①
-
Settings button
-
2.Tap the Settings button.
-
-
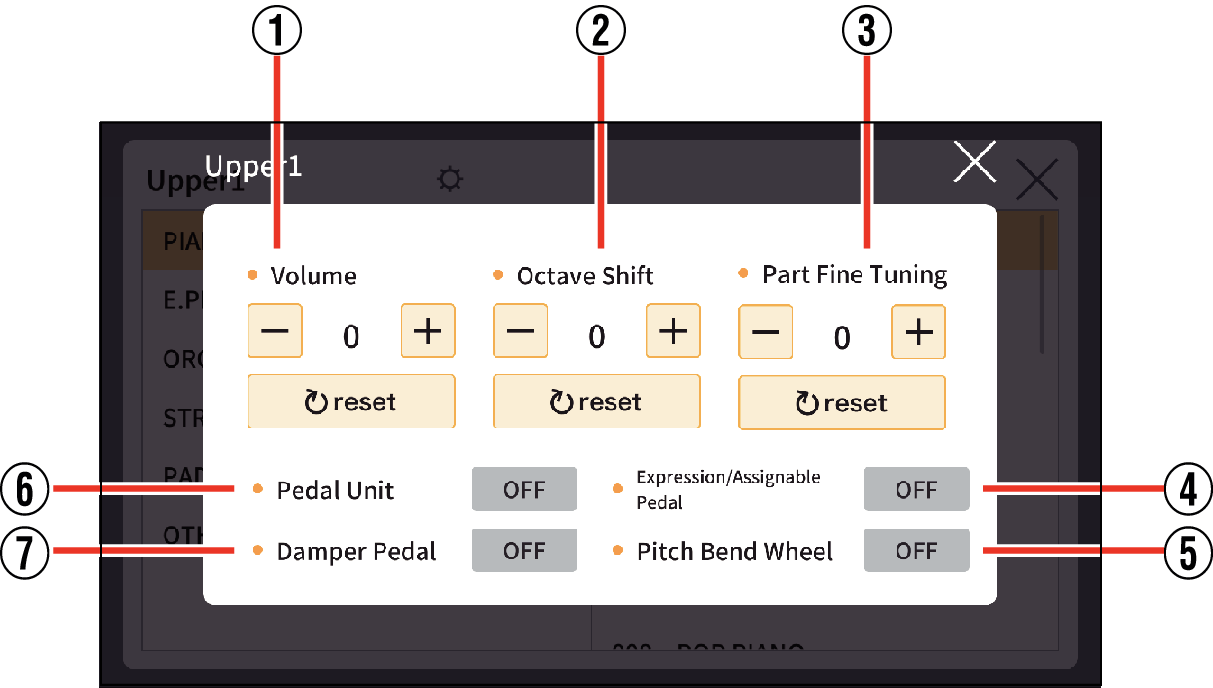
3.Specify the various settings.
The settings are all the same for Upper1, Upper2 and Lower.
- ①
-
Volume
Sets the volume. Tapping “+” increases the volume.
- ②
-
Octave Shift
Changes the keyboard range in increments of one octave. You can shift the range two octaves up or down from the original range.
- ③
-
Part Fine Tuning
This allows you to vary the tuning very slightly up or down by a semitone or less.
- ④
-
Expression/Assignable Pedal
Switches the Expression/Assignable pedal ON/OFF. Connecting the pedal provided (SP-3), the optional pedal (SP-20) or a third-party expression pedal to the musical instrument and switching it ON allows you to adjust settings such as the volume and tempo.
For more information on the expression pedal connection method and functions, refer to the User’s Guide for your musical instrument.
- ⑤
-
Pitch Bend Wheel
Switches the pitch bend wheel ON/OFF. Enabling the pitch bend wheel allows you to smoothly raise and lower the pitch of the tone that is currently sounding.
- ⑥
-
Pedal Unit
Switches the pedal unit ON/OFF. Connecting the pedal unit (three-pedal, optional) to your musical instrument and switching it ON provides pedal expression that more closely matches the grand piano experience.
- ⑦
-
Damper Pedal
Switches the damper pedal ON/OFF. Connecting the pedal provided (SP-3) or the optional pedal (SP-20) to the musical instrument provides performance effects such as sustained reverberation even after you take your foot off the pedal.
For more information on the damper pedal connection method and functions, refer to the User’s Guide for your musical instrument.
 Top of page