Recording a performance
You can record your own performances played on the app’s keyboard or an instrument’s keyboard and then save it and share it on social media.
Recording procedure
-
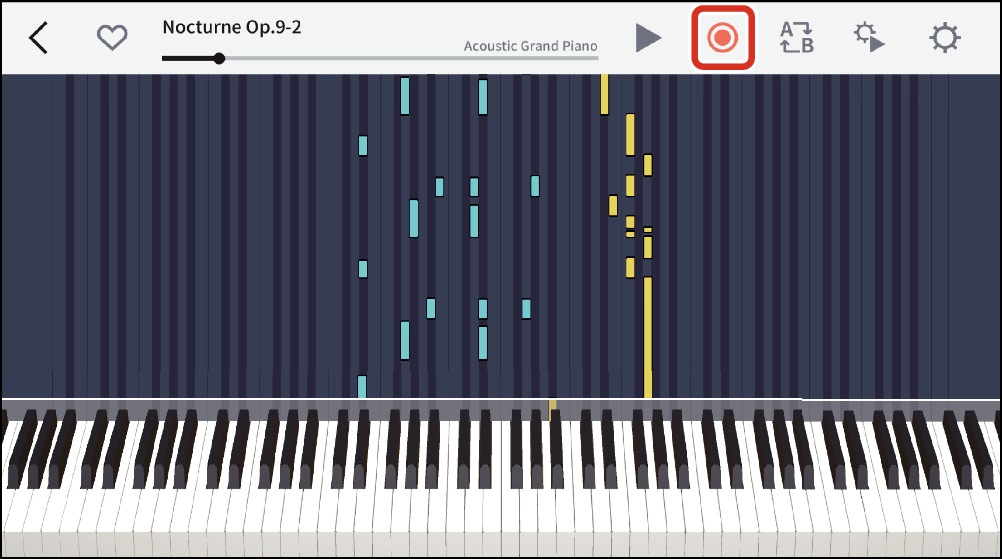
1.Select a song whose song category is Piano and tap the Record button.
-
-
2.Configure the recording settings.
-
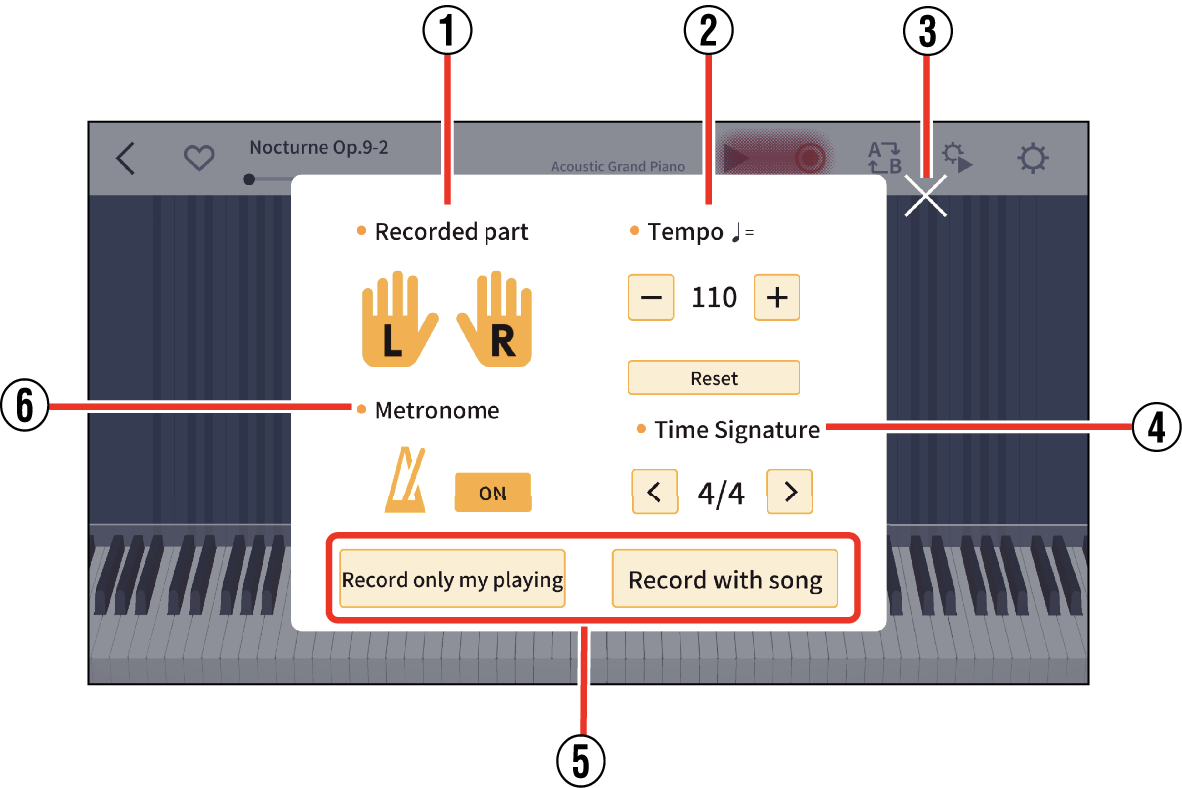
- ①
-
Recorded part
You can choose to record the right-hand, left-hand or both hands’ parts.
Selecting the right hand records to track 4, selecting the left had records to track 3, and selecting both hands records notes from middle C4 to track 4 and the notes from B3 downwards to track 3.
- ②
-
Metronome Tempo
Sets the tempo of the metronome that is heard during recording. Tap “+” to increase the tempo, and tap “-” to decrease it.
- To restore the default value, tap “Reset”.
- When recording along with a song, the metronome is set to the tempo of the selected song. You can also set the tempo as you wish on the settings screen. During playback of a song, the metronome will sound in time with the tempo and beat changes of that song.
- ③
-
Close button
Closes the Recording Settings screen.
- ④
-
Beat
Sets the Beat. Choose from 2/2, 2/4, 3/4, 4/4, 5/4, 6/4, 7/4, 3/8, 6/8, 9/8, and 12/8 beats.
- ⑤
-
Start Recording button
There are two ways to record. Tap one to start recording.
- Record only my playing: Records your playing without playing back the selected song.
- Record with song: Records your playing while playing back the selected song.
- ⑥
-
Metronome ON/OFF
Turn this on to play the metronome sound during recording.
-
3.Tap either of the recording start buttons.
-
- Recording begins.
- To stop recording, tap the Record button.
When you stop recording, the screen shown below appears.
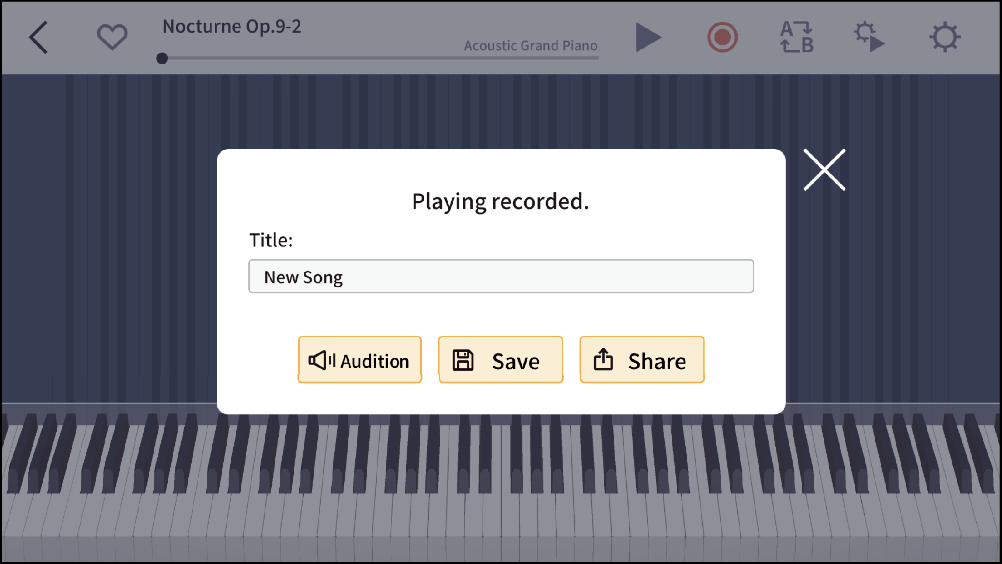
Title (song title input area): Enter the song title used when the recording is saved.
Audition:
Lets you listen to your recorded playing.
Save:
Saves the recorded playing.
Share:
Exports the recorded playing for sharing via SNS, etc.
To save a song you have played.
-
1.Tap the song title input area and enter the title.
-
- The maximum number of characters that can be entered is 30.
- Full-width and half-width characters can be entered, but symbols like emoji will not be displayed correctly.
-
2.Tap “Save”
-
- When you are saving a new file, a save confirmation message will appear.
- If there is a song with the same name, a message will appear to confirm whether you want to overwrite it.
-
3.Tap “OK”
-
- Saves the recorded performance file and returns to the Player screen.
- If you do not want to save the song, tap “Cancel”. Return to the Player screen before recording.
To share recorded playing via social media, etc.
-
1.Tap the song title input area and enter the title.
-
2.Tap “Share”
-
Video (still image + vocals):
Shares a recorded performance as a video file*1*2. You can then upload the file to YouTube or save it on a smart device.
- To upload files to YouTube, you will need a YouTube account.
- The YouTube upload screen is only shown in iOS.
- The maximum number of characters for entered items on the upload screen is 20 characters for each title and 1,000 characters for each description.
Audio:
Shares a recorded performance as an audio file*2*3. You can use this to send files as email attachments.
MIDI:
Shares a recorded performance as a MIDI file*4.
-
3.Tap the sharing method you want to use and choose the destination.
*1 For MP4 format, the file extension is .mp4.
*2 Songs played using in-app sounds
*3 iOS: AAC format; the extension is “.m4a”
Android: WAV format, the extension is “.wav”
*4 For standard MIDI files, the file extension is .mid.
About the Recorded Songs list
Tap “Recorded Song” in “Song List” to display the list of recorded songs (file names).
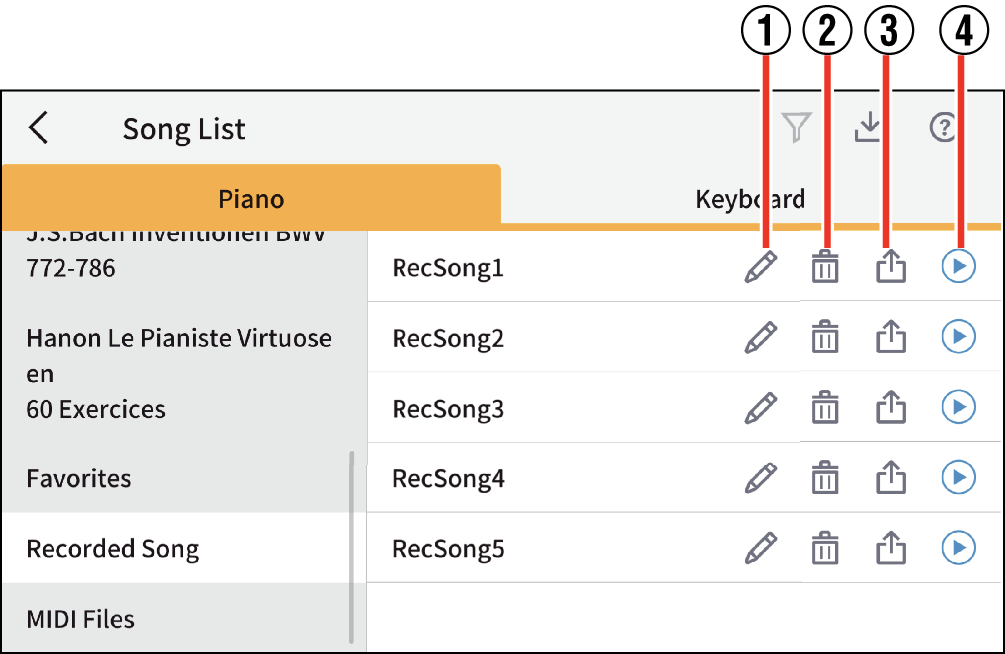
- ①
-
Title Change button
Tap to display the text input bar, and then change the song title.
- ②
-
Delete button
Tap to display the Delete Confirmation screen, and then tap OK to delete the song.
- ③
-
Share button
Tap to display the file Format Selection screen.
- ④
-
Preview button
Tap to listen to songs.
A maximum of 45 seconds will be played from the beginning of the song. To stop, tap the button again.
 Top of page