
Setting tones and layers
Instrument tones can be set and registered according to the mood of the song, etc.
Select Main Tone
-
1.Tap the “Tone” button.
-
2.Tap Main Tone.
-
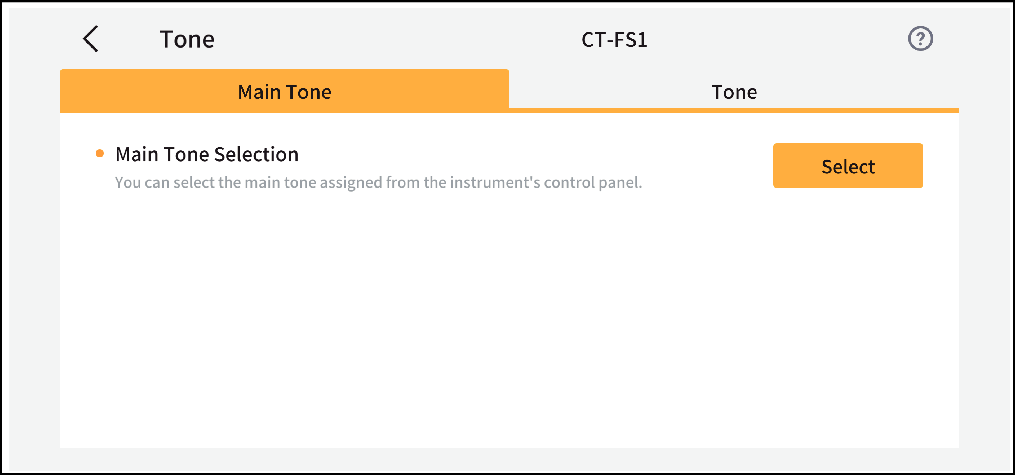
-
3.Tap the “Select” button
-
The main tone selection screen will appear for you to select the desired tone.
Select Tone
-
1.Tap the “Tone” button.
-
2.Tap “Tone”
-
3.Specify the settings below.
-
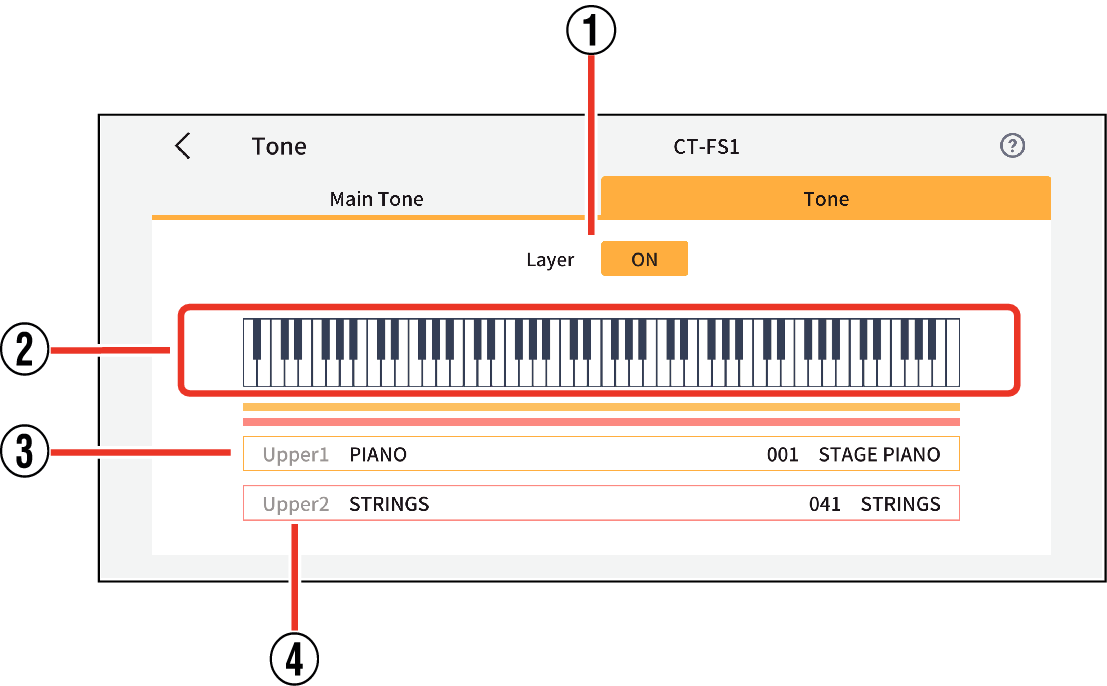
- ①
-
Layer ON/OFF buttons
Turns ON/OFF the function that allows you to layer and play two different tones. When ON, the layered tone (“Upper2”) is enabled and the sound is produced on “Upper1” and “Upper2”.
- ②
-
View by Part
The color of the display will be color-coded according to the settings of Layer.
Tap the keyboard to display a list of tone names.
- ③
-
Upper1 tone button
The main tone is displayed. Tap to display the tone list screen and change the tone settings.
- ④
-
Upper2 tone button
Displays when Layer is ON. The secondary layer tone is displayed. Tap to display the tone list screen and change the tone settings.
Part settings
-
1.Displays a screen showing a list of tones for the part to be reconfigured.
-
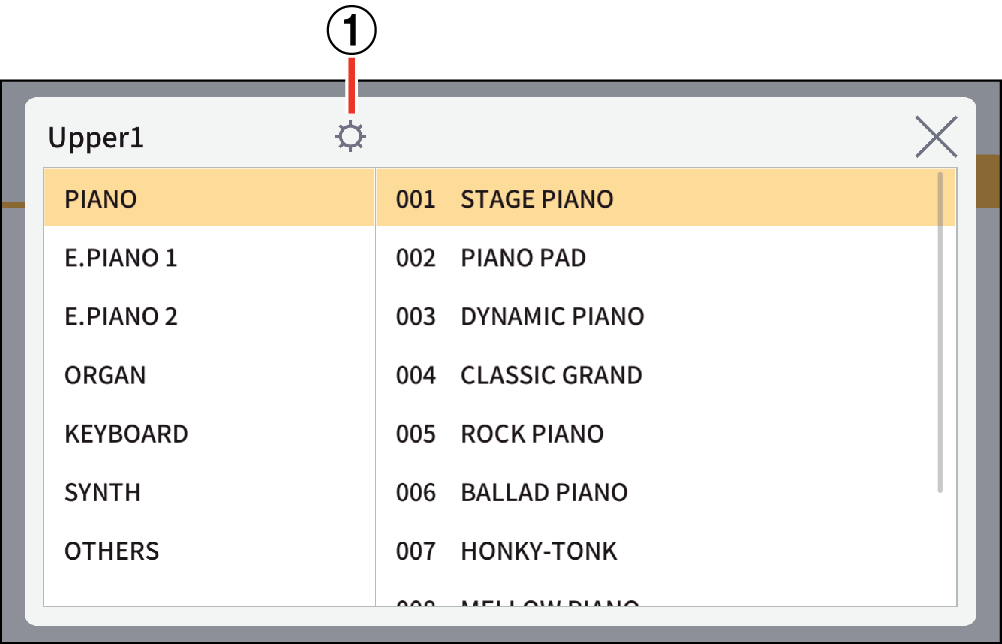
- ①
-
Settings button
-
2.Tap the Settings button.
-
-
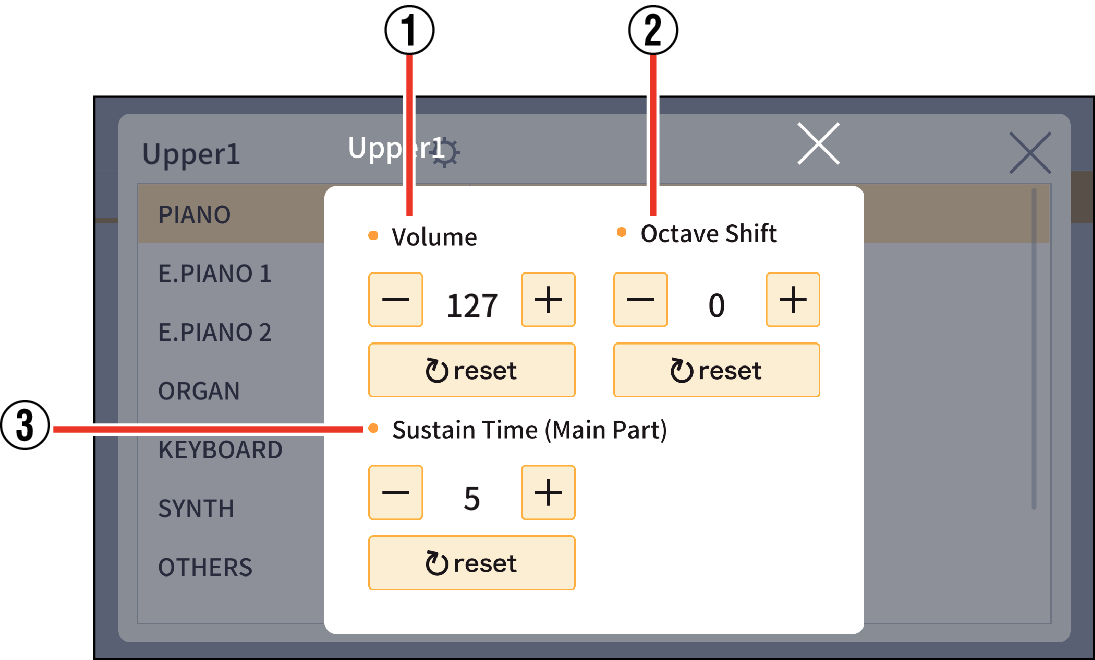
3.Specify the various settings.
Upper1, Upper2 Common
- ①
-
Volume
Sets the volume. Tapping “+” increases the volume.
- ②
-
Octave Shift
Changes the keyboard register in octave units. It can be changed up to three octaves above or below the original range.
- ③
-
Sustain Time (Main Part)
Sets the length of the reverberation. Each tap on the “+” button will increase the length of the reverberation.
In Upper1, you can set up and change Main Part, and in Upper2 you can set up and change Layer Part.
 Top of page