Automatically create chords just by selecting a song.
An easy way to write / print the chord chart for your favorite songs.
1. Choose an audio track
Touch the "♪" button and choose Demo Track 1, Demo Track 2, Demo Track 3 or iTunes Track.
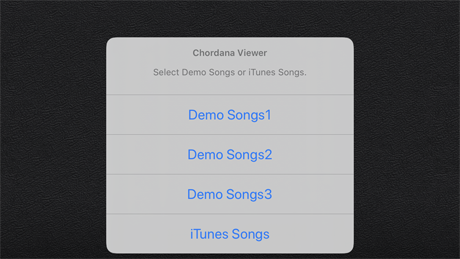
2. Analyze the audio track
A progress bar is displayed during track analysis. When analysis ends, the chord chart is displayed at the top of the screen, with the piano keyboard at the bottom.
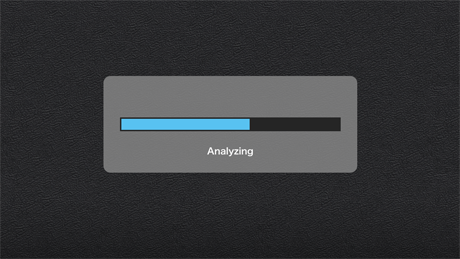
3. Play the song
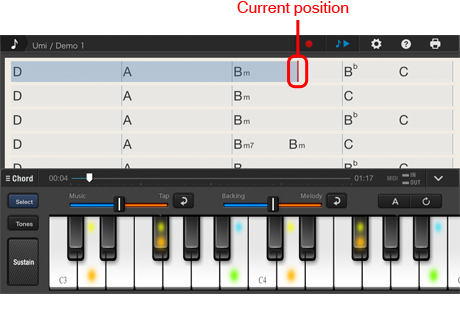
Touch the "Play" button to start playing the song. As the song plays, the positions of the analyzed chords are shown in the Performance pane. You can also touch the instrument pad to play along during the song. You can also adjust an analyzed bar line position by ±1 half note.
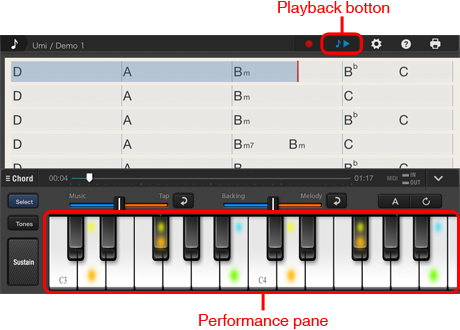
4. Check the analyzed chords
Try actually playing along with the song to check whether the analyzed chords are correct.
5. Select and edit chords
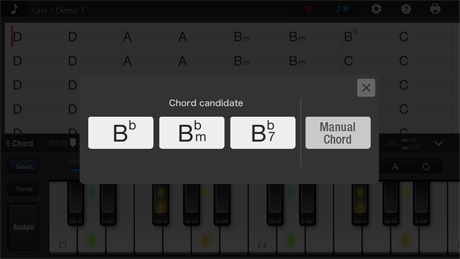
If a chord sounds wrong, touch the "Settings" button. From "Chord display settings", select "Screen Touch" > "Edit". Then, when you touch a chord to be changed, three candidates are displayed. Selecting the desired chord applies the notation for that chord.
6. Select and edit chords
If the chord you want is not among the candidates, select "Manual Chord" to display the "Chord List" screen. Specify the chord root on the left and the type on the right and then touch "Done". The selected chord appears in the chord chart. The chords played on the piano pad or guitar pad are also automatically changed to the new chord.
The accuracy of the analysis results is increased by setting parameters such as the measure and rhythm. The parameters you can set are as follows :
• Number of chords per bar • Chord set (basic, pop or jazz) • Tempo (slow, normal or up-tempo)
• Fixed tempo (ON or OFF) • Time signature (4/4, 3/4 or 5/4) • Chord arrangement (none, typical chords or tension chords) • Barline position(±half note duration)
By holding your finger on the piano keyboard and sliding it left or right, you can change the register.

Introduction of function (DEMO SONG 1)
Music/Arrange/Piano : Junichiro Kabayama, Singer/Words : Maya Hatch
• MIDI is a registered trademark of the Association of Musical Electronics Industry (AMEI).
• iPad and iPhone are trademarks of Apple Inc. registered in the US and other countries.
• App Store is a service mark of Apple Inc.
• Other product names and so forth are generally trademarks or registered trademarks of the respective companies.
7. Save edited chord chart
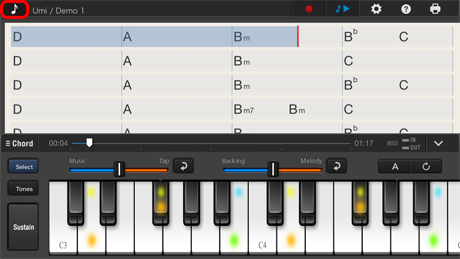
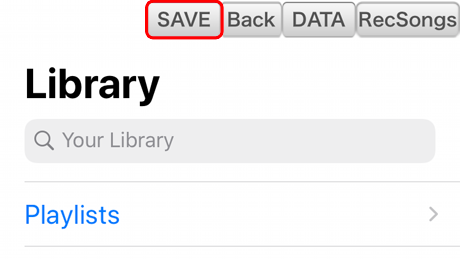
Once you have finished editing the chords, press “♪” in the top left of the screen, then press “Save" and “Yes” to save the edits in the data area. The next time you launch the app, you will be able to select saved chord chart directly from the data list, eliminating the time taken for chord analysis and letting you access the chords instantly.
8. Exchange edited chord chart via email
You can exchange chord chart saved in the data list with other Chordana Viewer users via email.
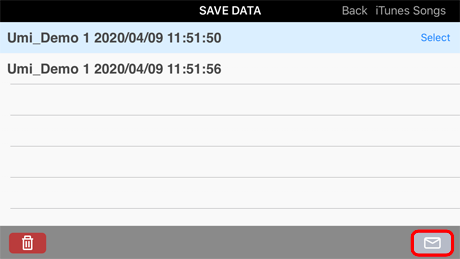
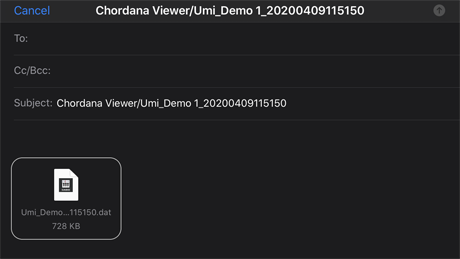
Press the “♪” button and then press “Data” to select the chord to be emailed. Then press the “Mail” icon in the bottom right of the screen to launch the mail app. Select the address of the recipient and press the Send button to send the chord.
The user receiving the email taps the data in the mail app and selects “Open in Chordana View”. When Chordana Viewer opens, the user selects "iTunes track" and then presses the “Data” button to view a list of the received data. Pressing “Select” and then ”Yes” displays the received chords.
9. Print chords
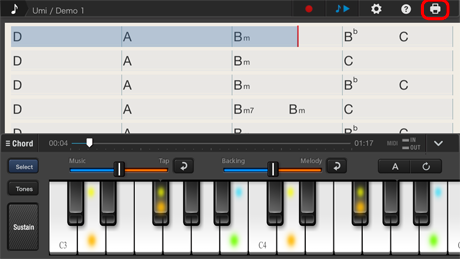
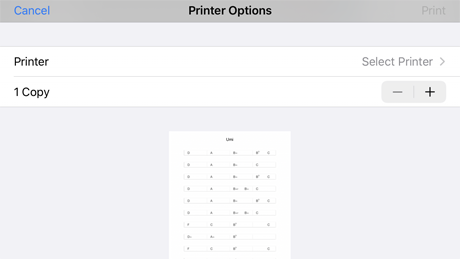
You can also print out chord chart stored in the data list.
Press “Print” in the top right of the home screen, select the printer and then press the "Print” button to print the chord chart.
10. Examples of connected musical instruments
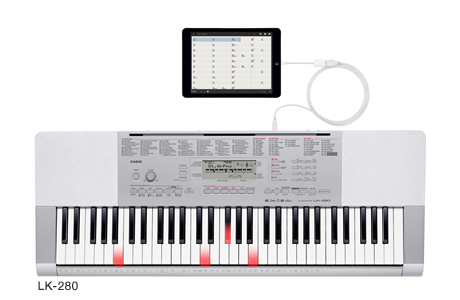
If the Chordana is connected to a model such as the Casio LK-280 lighted keyboard, which features keys that light up, the created chord and its root (the low notes for the chord) will light up as a guide.
Recommended connected models: LK-280, LK-240, LK-247, LK-160
Troubleshooting
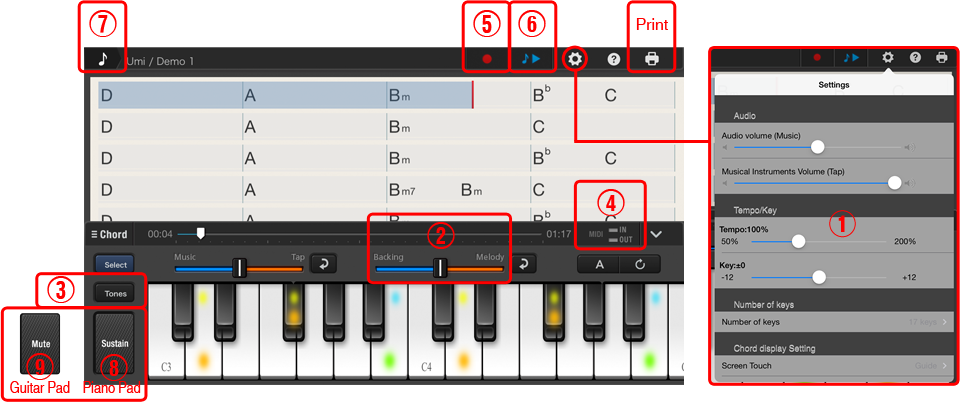
- Q1: I want to play the song at a different speed.
- A1: Use the TEMPO button (1) to change the speed.
- Q2: I want to make the accompaniment louder.
- A2: Use the Accompaniment - Vocals slider(2) to change the playback balance.
- Q3: I want to change the tone.
- A3: Use the Tone button(3) to change the tone. You can also increase the number of tones. (Charges apply.)
- Q4: I want to connect a musical instrument.
- A4: If using the MIDI function, connect to an electronic musical instrument via an Apple Lightning-to-USB Camera Adapter*2 + USB cable. The MIDI icon (4) appears when you connect the instrument. (*2: If the Lightning to USB Camera Adapter or Apple iPad Camera Connection Kit is used with an iPhone, iOS 7.0 or later is required.)
- Q5: I want to record a performance.
- A5: Press the Record button(5) before pressing the Play button(6). Tap along with the song.
When you want to stop recording, press the Record button(5) again.
The recorded song appears on the list of recorded songs displayed when you press the SONG button(7) and then touch the recorded songs in the top-right of the screen.
Touch the list and then press the Play button to play the recorded song.
- Q6: I want to sustain a note I played on the piano pad or keyboard.
- A6: Press the Sustain button(8). On the piano pad, the note is sustained for as long as you keep pressing the button.
On the keyboard, it continues until you press the next note.
- Q7: I want to mute the sound on the guitar pad.
- A7: Press the Mute button(9).
- Q8: I can't use the tone or rhythm I paid for in the app.
- A8:Press the settings button and then press “Restore other”.
